
Design Patent Drawing Checklist
Ensuring Excellence: Key Points for Flawless Design Patent Drawings
In the world of design patents, meticulous preparation of drawings is paramount. Each element of the drawing process, from sourcing material and drawing approach to determining details and views, plays a critical role in the accuracy and effectiveness of the final patent submission. This comprehensive checklist delves into the key aspects of design patent drawing preparation, providing a step-by-step guide for patent practitioners and inventors alike.
1. Drawing Process Options
Choosing the right drawing process is crucial for accurate design patent drawings. Errors in the process can lead to inadequate representation, potentially affecting the patent’s validity. There are two primary methods: manual image tracing or generating drawings from 3D models. A 3D model-based drawing method is ideal for accuracy and completeness.
A 3D Model-Based Drawing Method
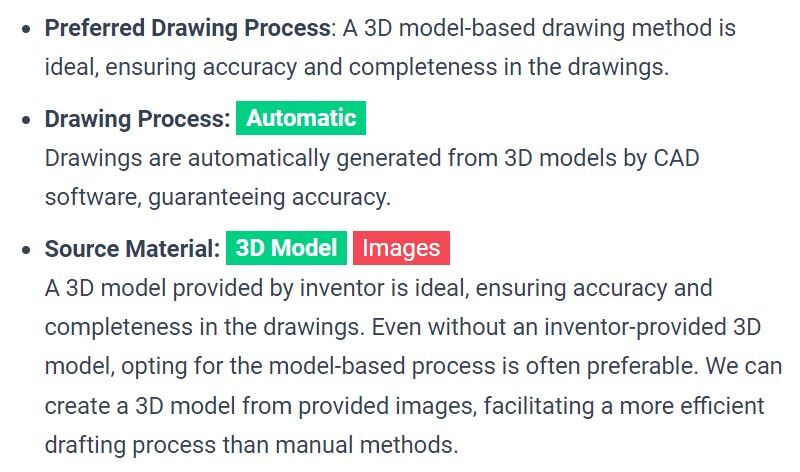
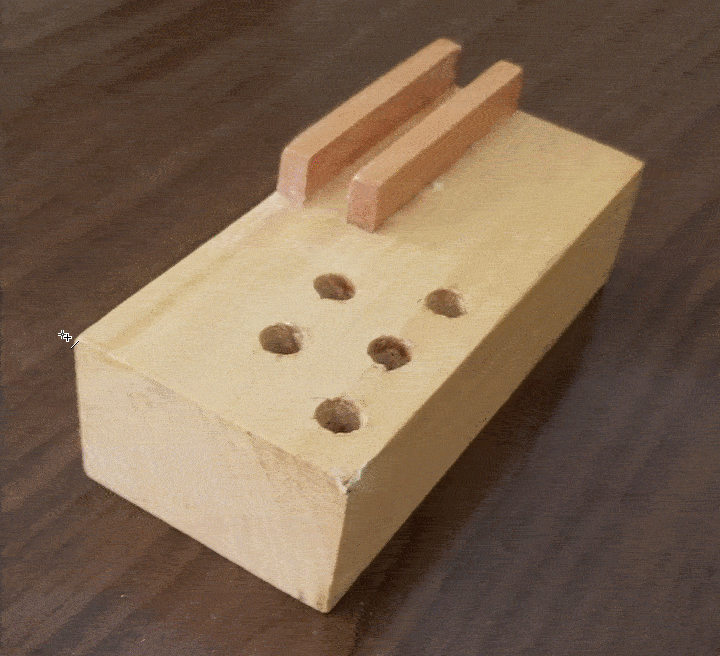
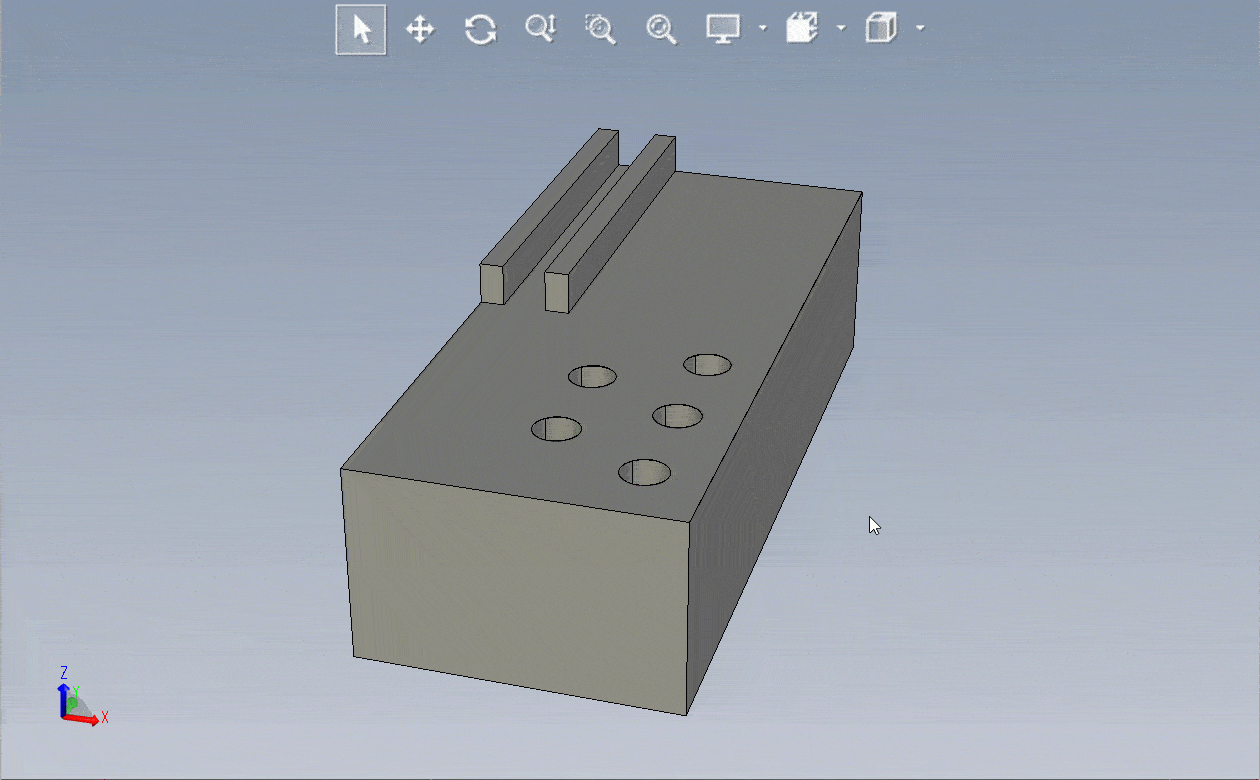
- Preferred Drawing Process: A 3D model-based drawing method is ideal, ensuring accuracy and completeness in the drawings.
- Drawing Process: Automatic
Drawings are automatically generated from 3D models by CAD software, guaranteeing accuracy. - Source Material: 3D Model Images
A 3D model provided by inventor is ideal, ensuring accuracy and completeness in the drawings. Even without an inventor-provided 3D model, opting for the model-based process is often preferable. We can create a 3D model from provided images, facilitating a more efficient drafting process than manual methods. - Quality, Accuracy, and Consistency: High
Software-generated drawings from 3D models ensure precise and consistent design representation across all views. - Quality Control: Minimal
Drawings generated from a 3D CAD model with software guarantee 100% accuracy, eliminating the need for thorough inspection. - Risk of Defective Drawings: Minimal
Drawings created automatically by software from a 3D CAD model ensure accurate representation with no room for human error. - Ability to Add Views: Easy
With a 3D model, any view, including special views like sectional or exploded, can be easily generated, ensuring full disclosure of the claimed design. - Ease of Broadening the Claim: Easy
A 3D model allows for straightforward adjustments such as dashing-out, modifying, simplifying, or omitting parts of the design, resulting in broader and stronger protection. - Design Patent Quality: Enhanced
The ability to view and analyze a 3D CAD model from any angle enhances collaboration and decision-making, leading to superior design patents. - Speed: Rapid
Advanced 3D CAD tools reduce what would be an hour-long manual drawing process to just minutes. - Cost: Affordable
Utilizing 3D CAD models boosts efficiency, resulting in cost savings.
An Image Tracing Drawing Method
- Drawing Process: Manual Image Tracing
Images are manually traced in drafting software to create line drawings, a process that is time-consuming and susceptible to errors. - Source Material: Images
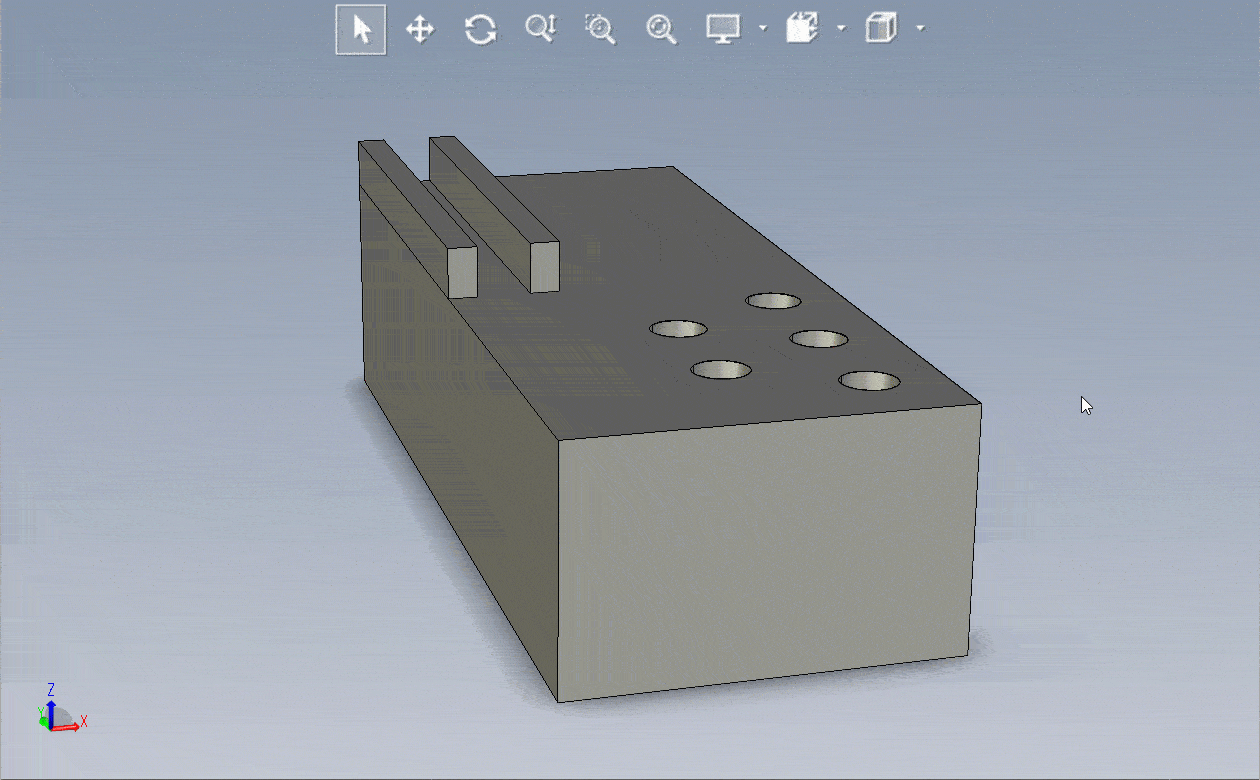
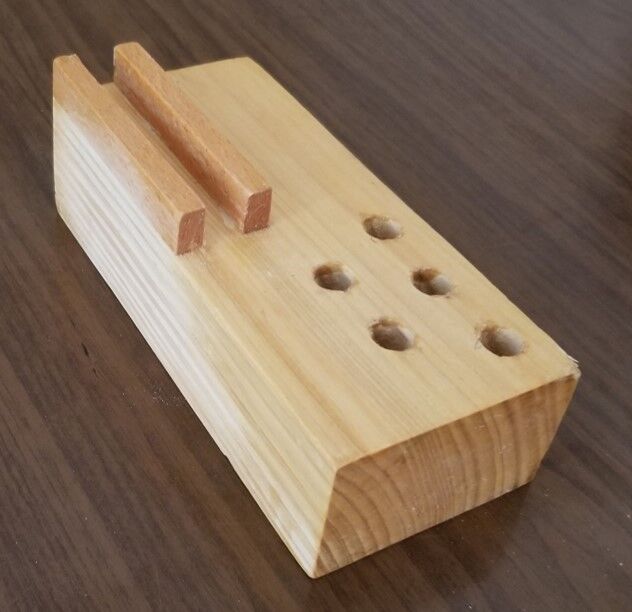
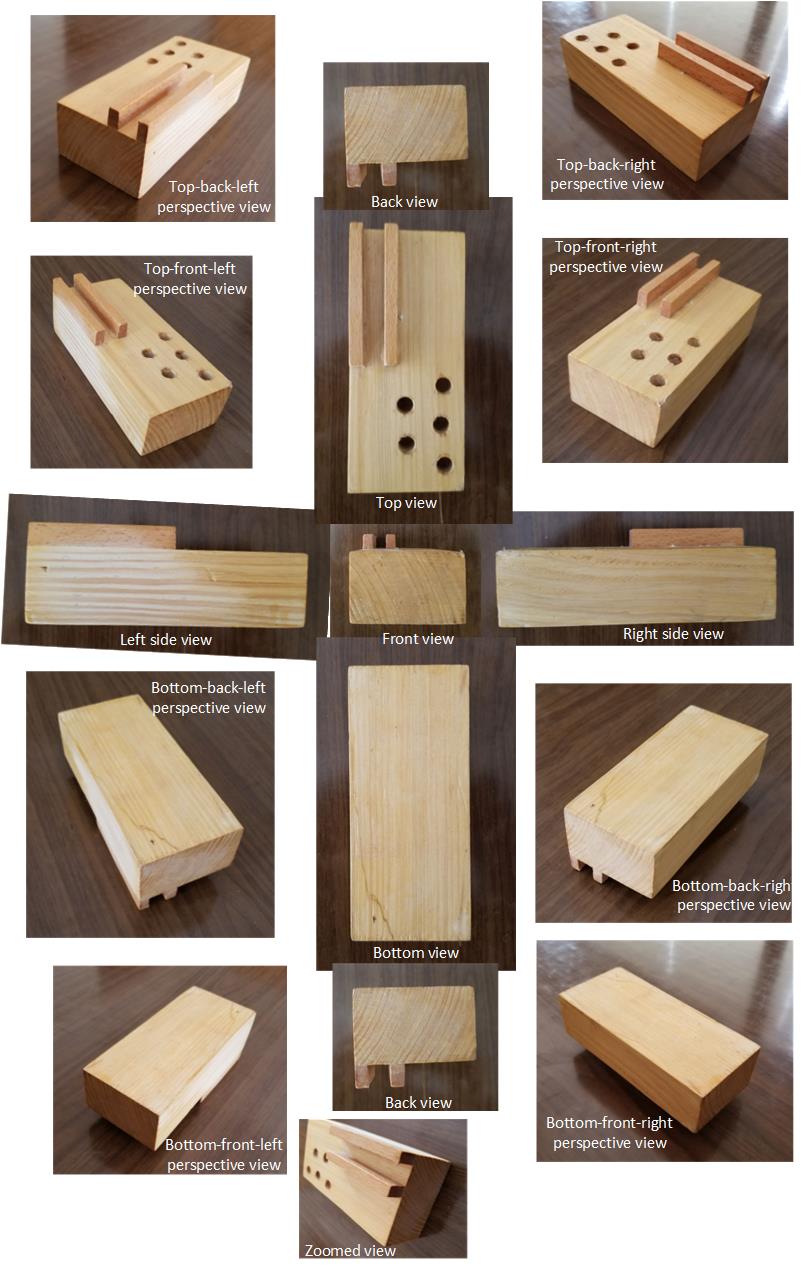
Request a comprehensive set of images, including front, back, sides, top, bottom, perspectives, and zoomed views of complex areas. - Quality, Accuracy, and Consistency: Low
Manual tracing of images for multiple views is error-prone, making it challenging to maintain consistent and accurate appearance across all views. - Quality Control: Maximal
Manually traced drawings lack guaranteed accuracy and consistency, necessitating thorough inspection. - Risk of Defective Drawings: High
Manual tracing leaves ample room for human error and mistakes. - Ability to Add Views: Challenging
Requesting necessary views from the inventor can be complex, making it difficult to add any view, including special ones like sectional or exploded, potentially risking incomplete disclosure of the design. - Speed: Slow
Manual drafting is a time-consuming and tedious process, requiring significant effort to ensure consistency across multiple views. - Cost: Expensive
Time is money, as they say. Because manual 2D drafting takes longer, it also costs more.
2. Source Material
The quality of source material is paramount for creating accurate design patent drawings. Insufficient source material can lead to inadequate representation of the invention, potentially affecting the patent’s validity. There are two primary source materials: 3D models or images. A 3D model is ideal for accuracy and completeness.
3D Model
- Preferred Source: A 3D model is ideal, ensuring accuracy and completeness in the drawings.
- Ease of Source Material Acquisition: Superior
Obtaining a 3D model from the inventor is more straightforward than instructing them on creating images of the invention, simplifying the initial stages of the design patent drawing process. - Preferred File Formats: .step or .stp
Provide the model in .step or.stp formats if possible. Otherwise, any 3D model format is acceptable.
Images
- Complexity of Source Material Acquisition: High
Requesting the necessary views from the inventor can be complex, and ensuring proper plain views of the invention with minimal perspective distortion can be challenging, adding intricacy to the image-tracing-based drawing process. - Preferred View Set for Images as Source Material:
Request a comprehensive set of images, including front, back, sides, top, bottom, perspectives, and zoomed views of complex areas:
3. Shading Options
Shading is crucial for representing the 3D character and contours of a design in 2D patent illustrations. The two main shading techniques are line shading (using lines) and stippling (using dots). Occasionally, greyscale or color photography may be used, but this requires justification by the inventor or attorney. Inadequate shading can result in an incomplete representation of the invention, which could impact the patent’s validity. Understanding the importance of shading in drawing quality is essential for patent practitioners and inventors.
Stippling
- Preferred Shading: A stipple shading is ideal, ensuring accuracy and completeness in the drawings.
- Shading Process: Automatic
Stipples are automatically generated by software, guaranteeing accuracy. - Quality, Accuracy, and Consistency: High
Software-generated stipple shading ensure precise and consistent design representation across all views. - Quality Control: Minimal
Stipple shading generated with software guarantee 100% accuracy, eliminating the need for thorough inspection. Additionally, stippling drawings are straightforward, making them easy to understand and review for patent lawyers as well as the notoriously picky USPTO examiners. - Risk of Defective Drawings: Minimal
Stipple shading created automatically by software ensures accurate representation with no room for human error. - Speed: Rapid
Advanced stippling technology reduces what would be an hour-long manual shading process to just minutes. - Cost: Affordable
Utilizing automatic software generated stipple shading boosts efficiency, resulting in cost savings. - Detail Level: High
Stipple shading enables the highest level of detail, surpassing what is achievable with regular line shading methods.
Parallel Lines Shading
- Shading Process: Manual
Surfaces are manually shaded to create 3D appearance in the drawings, a process that is time-consuming and susceptible to errors. - Quality, Accuracy, and Consistency: Low
Manual shading of surfaces for multiple views is error-prone, making it challenging to maintain consistent and accurate appearance across all views. - Quality Control: Maximal
Manually shaded drawings lack guaranteed accuracy and consistency, necessitating thorough inspection. - Risk of Defective Drawings: High
Manual shading leaves ample room for human error and mistakes. - Speed: Slow
Manual shading is a time-consuming and tedious process, requiring significant effort to ensure consistency across multiple views. - Cost: Expensive
Time is money, as they say. Because manual shading takes longer, it also costs more. - Detail Level: Low
Manual application of line shading to each surface is time-consuming and risks making the drawing too busy, often resulting in “white areas” where details are not shaded.
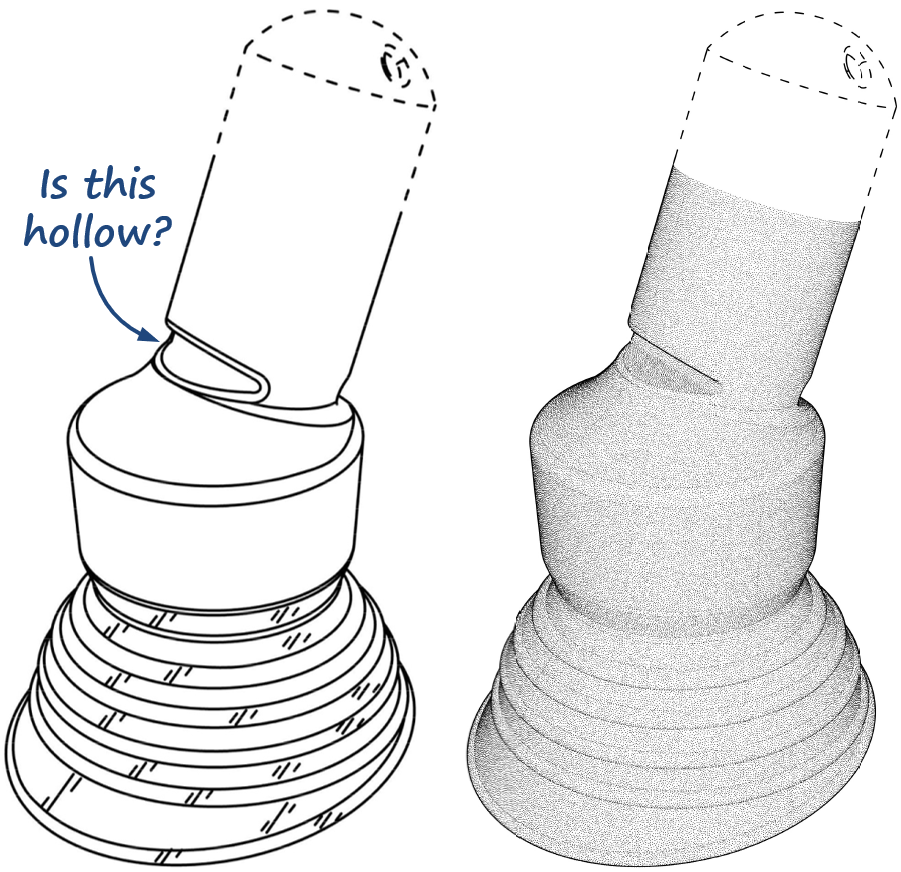
4. Details
For proper preparation of design drawings, it is essential to identify the following before starting the drawing process:
- What parts of the design will be disclaimed with dashed lines.
- What parts of the design will be completely omitted, such as screws, holes, or hardware.
- What parts of the design should be optimized for appearance, including removing or changing unnecessary elements.
- What parts of the design should be simplified, such as rounding edges or simplifying complex features.
5. Views
When preparing design drawings, considerations should be made regarding the inclusion or omission of views. Special views that need to be shown should be identified and discussed to ensure comprehensive and accurate representation of the claimed design.
Recommended Webinars
Delve deeper into the topics discussed in this article by attending our webinars. These sessions provide further insights and offer the chance to interact with experts in design patent drafting and illustration.
- Design Webinars: Avoiding Non-Correctable Errors in Design Patents:: Discover how to avoid non-correctable errors in design patents and ensure the success of your applications in this informative webinar by IP DaVinci.
- Design Webinars: Handling Advanced Scenarios in Design Patents: Explore strategies for handling advanced scenarios in design patents in this insightful webinar by IP DaVinci, enhancing your ability to navigate complex cases.
- Design Webinars: Cost and Time Saving Tips for Design Patent Drawings: Learn cost and time-saving tips for design patent drawings in this practical webinar by IP DaVinci, aimed at streamlining your patent application process.
Provide Feedback
We value your feedback! Let us know how we can improve or what topics you’d like to see next.
Connect with Mike
Have questions or need support? Connect with Mike for personalized assistance.
Share Your Experience
Found our series helpful? Share it with your network and help others benefit too!